Propagation of the Third Kind

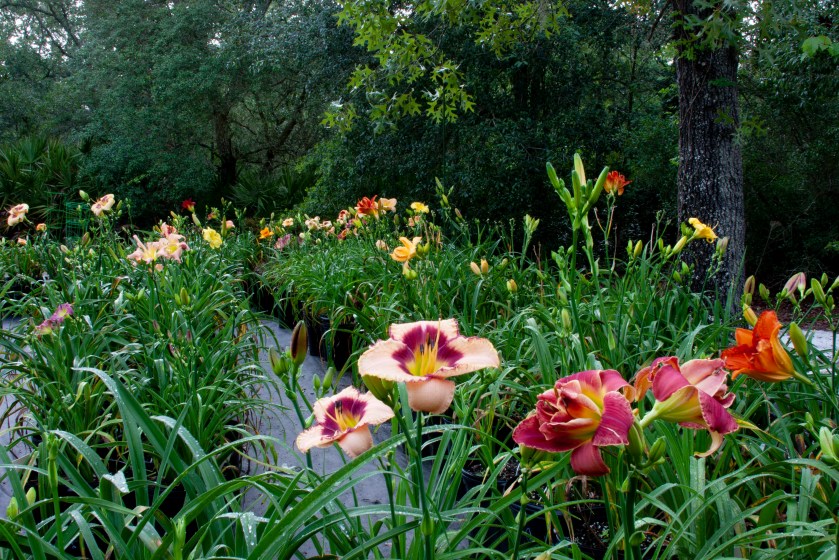
Three ways to increase the size of your daylily garden.

Watch for new fans to emerge next to the parent plant. Separate them carefully and relocate them to their own place in the garden.

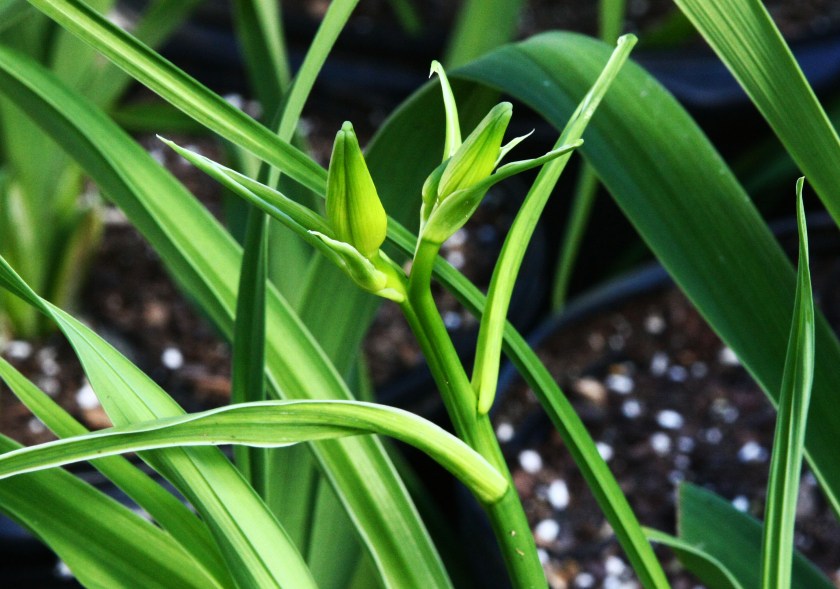
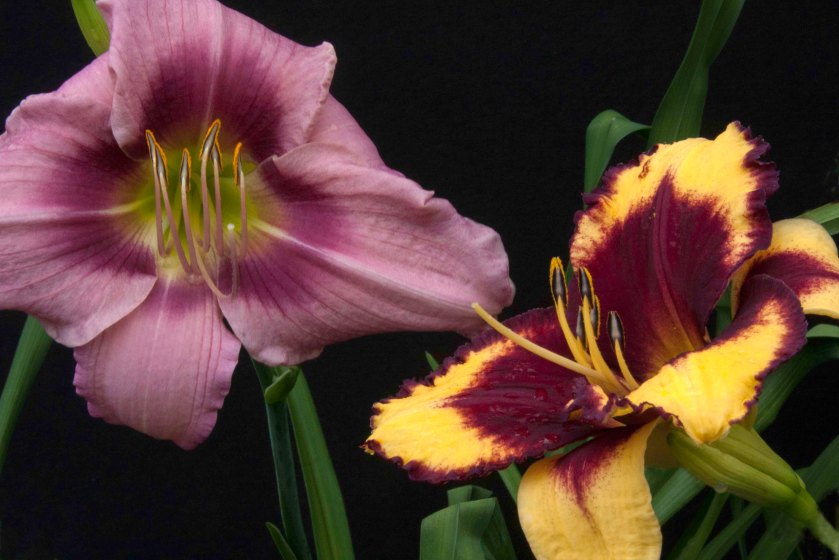
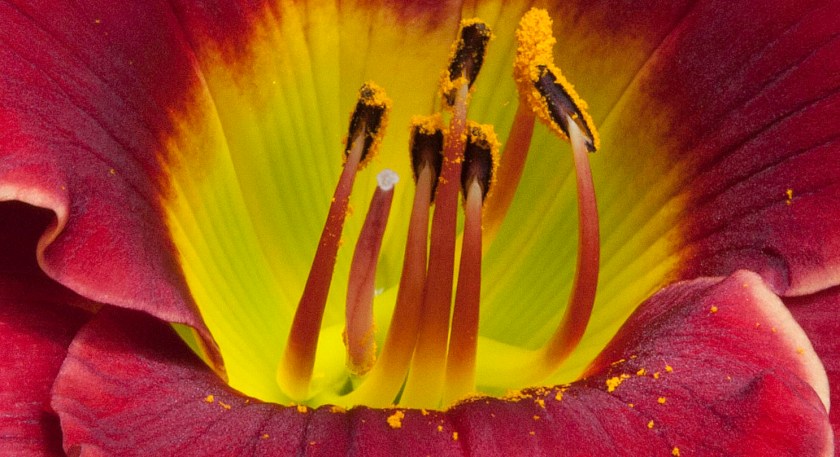
Let the bees, butterflies and Humming Birds do their job. Save and store the seeds after pollination for replanting later. Mother Nature will surprise you and give you different colors from the seeds. You can even cross-pollinate different blooms from different daylilies your self and experiment for new colors.

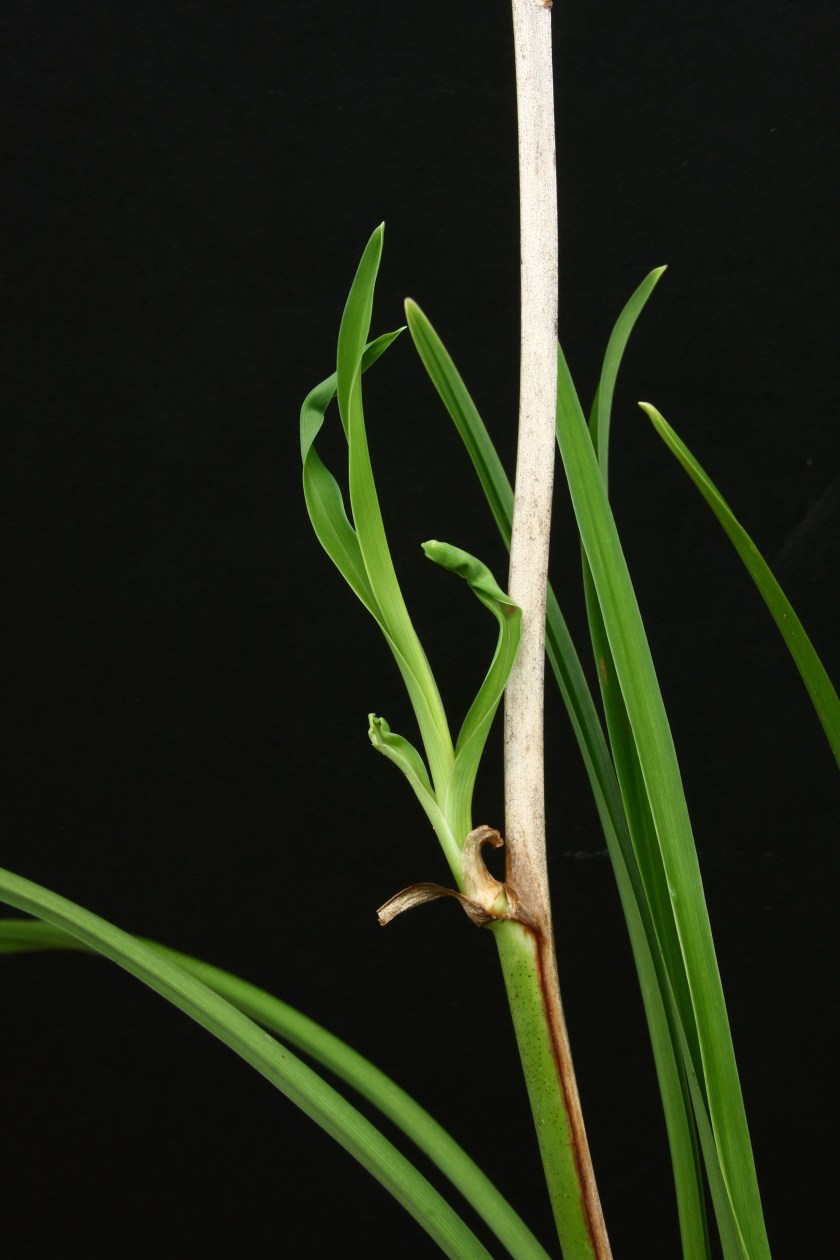
Watch for proliferations of young new plants or fans forming on the stems where buds have formed and bloomed but have died and fallen off. When you see the roots emerging cut off the stem below the young fan or proliferation and put them into moist soil.

Note: Not all daylilies will produce proliferations.

Either way it is a lot of fun and you may learn something new.

This is for my daughter Rachel who has shown an interest in daylilies and eagerly awaits the challenge and willing to learn something new and rewarding.

Proliferation 23 July 18 IMG_7584

Year 2018

This year 2018 started out well. In the month of May just as expected our daylilies were full of swollen buds in every direction we looked. The mornings were pleasant and the sun was warm. With the daylilies blooming everywhere in the early morning I was setting up my camera and tripod each day to begin taking the photographs that I enjoyed so much every year. Then it started to rain. It is now the end of July and still it rains every day. The temperature stays around 85 to 95 degrees with the humidity at 90 to 97 percent. With the real feel temperature at 103 to 104 degrees. I have lived in Florida all my life and have never seen weather like this before. The daylily blooms are lovely but the foliage is suffering from fungus causing much black spot and rust. The plants are not very pretty this year. You can say “the fungus is among us” and be correct. I am happy to say that the photographs have turned out nice and will be posted as year 2018 pictures. I haven’t decided yet to post all of the pictures or just the new varieties as it depends on the space available on the web site. I hope you enjoy them as much as Theresa and I do.Daylily Garden - 22 May 18 IMG_6597

Wind Frills blooms

Wind Frills 28 Dec 17 IMG_5776

On a dark, cold and raining morning on 28 December 2017 at approximately 7:00am one of three buds on a daylily named Wind Frills came into this world and opened itself up in full bloom to the world on the opposite side of the blooming cycle. Alone and in a strange place, awoke and seems to look around at an empty and cold garden to find its place among all the sleepers not yet ready for the warm Spring rains that will signal their rise to glory. It surely must know that by sunset it will have slowly faded away into the darkness of the night and never be seen or noticed by all the others. Why does it bloom when all the others are still asleep? How do we relate this phenomenon to the human adventure when a few are awake when many are still asleep?

To bloom or not to bloom

To bloom or not to bloom is the question we have asked over the years. When a growing healthy daylily proudly displays its beautiful blooms in the Spring of 2016 and decides not to in 2017 we ask why? So far we have found no answers but we keep trying. Is this normal or are we doing something wrong or is there something we are not doing. We are beginning to keep more detailed records and do further research to find the answers. The photos show the daylilies that bloomed in 2016 but were no shows in 2017. If any readers or followers have experienced this phenomenon please email or comment and tell us about it. It would help us in our research.

This is very unusual

Wind Frills December buds IMG_5762

It is very unusual to have a daylily in bud in December but Wind Frills has managed for some reason only known to nature. While the other 100 plus varieties all hunkered down for the winter season. The coming cold could be harsh for this lonely daylily. It will require our personal attention and care to survive and bloom. When the overnight temperature is going below 40 degrees we will bring it into the warmth of the house. Since all of our daylilies are in 5 Gallon pots this is easy to do. The only problem we have with this is our pet cat named “Cat” loves to chew on any and all green house plants and it’s like trying to keep squirrels out of the bird feeder. Wind Frills should bloom in January and when it does we will show you a nice picture.
P.S. “Cat”, a totally black kitten with green eyes appeared one day from out of nowhere and claimed us as her new owners. I found her in the yard one day, lost, alone, hungry and abandoned. I never saw myself as a cat person but what else could I do but pick her up, bring her into my home and offer her a dish of milk. She is now a part of the family.


A twist of nature


Graceful Eye (L), Goldenzelle (R) 8 Jun 17 IMG_5141

Pollen 2 Graceful Eye 17 Jun 17 IMG_5254


Pollen 1 Lovely LadyBug 25 Apr 17 IMG_4614

We have been growing daylilies successfully for a number of years. We have increased the size of our garden by doing it the normal way, the way most people do who love daylilies. We take good care of each plant and give it everything it needs to thrive and reproduce. Soon it will pay us back with new or baby fans which will bloom true to its parents. This is a beautiful thing if you like more of the same. Theresa and I enjoy seeing and raising new varieties but the only way we have to do this is to buy new varieties from other growers or hybridizers. We have had conversations lately and discussed the possibility of hybridizing our own. Just think about it, we could cross breed some of our plants and come up with a beautiful new bloom which no one has ever seen before and give it a new name, one of our own choosing. To be honest we don’t have a clue how this is done but we are researching this. Kathy’s Daylilies is a good place to start. They are doing this successfully and it is a great place to start. We have provided a link to their website. Check it out. You will be amazed. To put it simply, as Kathy’s friend said to her, “You just put pretty on pretty”. But I am sure there is a little more to it. You are fooling around with Mother Nature but the rewards can be worth it. Who knows, maybe Mother Nature just hasn’t got around to it yet. I am sure she would approve.

UPDATE

So far my limited research has shown me that hybridizing can be simple or complex depending on how in depth you wish to pursue your passion. There is something here for everyone. Watch Mother Nature and let her give you a hint as how it is done. A few YouTube videos will take you through the steps in this process to get you started. Check out the links.


And the cycle begins again.

Potting IMG_5719Potting IMG_5721Potting IMG_5723

In the Florida fall, when the days are shorter and the air is dryer and cooler the leaves on the Maple and oak trees begin to turn a beautiful golden orange and red. This is the signal that its time to examine the daylily plants closely. They have stopped blooming for now and it is time to prepare them for the coming winter. This preparation will carry them through to the warmth of the spring into the next glorious blooming cycle. We always start by separating the many babies, which are actually new fans. They have grown up in the pot next to the original mother fan. It’s becoming very crowded now with all these fans competing for water and nutrients from the soil. It’s better to separate them and put them in their own pot. Now your garden has just doubled or tripled in size, unless you can bear to throw the babies away and toss them aside into the garbage pile. This is where I have problems and is why our garden is getting so large. It has become an emotional thing and we all have to deal with it in our own way. When separating these young fans, you will notice that they don’t always come apart easily and may have to be gently separated with a sharp knife.

After two years the soil in the pots need to be changed out with new soil. We use a mixture of our own which is not too heavy and not too light but will drain well. We use the soil mixture we have talked about earlier. It will do them good if you add a little low nitrogen timed release pelleted fertilizer and mix it in with the new soil. This will stimulate the root. Trim the leaves back, removing all the old outer leaves as we did in the pictures. Water them thoroughly. So far they have all taken the Florida winters very well. Water them good before a freeze. This will help to protect the roots. Now, what to do with the old soil which is not only depleted of the needed micro nutrients but it now contains a concentration of minerals like calcium, lime, iron, sulfur or whatever is in the water you use. Too much of these minerals can interfere with the plants absorption of the fertilizer. Other reasons to change out the soil is to remove any insect larvae and other pests that’s in the soil and is also waiting on the spring to do what they always do and that is to feed on your plants. It can be very wasteful to discard all of the old soil as it is our case with so many 5 gallon pots. What we do is first examine the old soil and plants to see if it is healthy with good roots and we find no trace of pests or disease. We then mix some of this soil in with the new batch but no more than half of it. If we find the plant diseased or infested with pests we dispose of it well away from our garden.

The good, the bad and the ugly

Bull Ants IMG_5691

Welcome to the ugly bug ball. Where we live, in Florida, we have bugs, lots of bugs, bugs everywhere. They’re in your house, they’re in your car, they’re in your hair and even your cup of coffee. Yep, there’s one now swimming around. Coffee is cold anyway. In fact when people visit Florida this is the first thing they talk about. “You sure have lots of bugs here”. Or “What’s that thing flying around”? Or “It’s crawling on me, get it off, get it off. I’ve taken a few pictures to show you but it’s not easy since they won’t stay still. They’re either crawling, jumping, hopping or flying away. “Quick, take it now,”I hear in the background, “it’s leaving”. They come to your garden, lots of them. Some of them like your daylilies. You can easily see some of them. The bad bugs like grass hoppers and caterpillars eat the leaves while centipedes and grub worms are in the soil out of sight eating the young tender roots. Other bad bugs, like aphids and spider mites, are very small and hide deep down in the leaves. You may not know that they are there until your plants don’t look so good any more. Believe it or not there are good bugs that come to your daylilies to eat too but not to eat them but to eat the bad bugs. Lady bugs are welcome in our garden because they feed on some of the bad bugs. If you decide to use insecticides on your plants, remember you are likely killing the good bugs along with the bad ones. The American Hemerocallis Society, (AHS) which I have provided a link to, list 21 bad bugs to watch for and is a great place to go for help with your daylilies. From their front page do a search for pest and also for beneficial insects. What are you going to do when they come for you. Bad bugs, bad bugs.


%d bloggers like this: